Slimming World from a sarcastic stressed-out Mummy's point of view!

Tuesday, 13 September 2016

Slimming World Classic - Crustless Quiche

When I did Slimming World for the first time around 7 years ago, in between offspring numbers one and two, this was a favourite recipe of mine. It's so versatile, easy to make and handy to have in the fridge that it still appears on my plate virtually weekly. You can chuck any old gumpf in it, make individual ones, add your HEA of cheese on top, throw it all in the oven  and 30-40 minutes later have something that doesn't even slightly resemble a quiche, but is pretty tasty anyway. Today I made pea, ham and tomato, which is SP friendly too, and enjoyed it with a big salad for lunch. The rest will go in the fridge for those moments when I need something a bit more substantial than another bloody apple to snack on. They're good cold too, so packed lunches, taster night and picnics are go.


To make Pea, Ham and Tomato Crustless Quiche for four you will need:


  • 6 eggs
  • 150g fat free cottage cheese
  • 5 slices wafer thin lean ham
  • 2 tomatoes
  • half a cup frozen peas
  • salt and pepper
Beat the eggs with the cottage cheese and season well. Chop the ham and tomatoes and add to the egg mix with the peas, and stir to combine. Slop it all into a flan dish (I use a silicon one so it slides out easily) and bake at 200/gas 6 for 30-40 minutes until set. Don't leave it too long, it goes a bit rubbery if overcooked. Serve with a big salad for a perfect SP lunch, or add some Slimming World chips if you're not into the SP life. SP Army represent! OK, I'm having a few SP days because I ate too much cake last week...I'll be back to bananas, chips and mullerlights after weigh in...

Other favourite combos to use are leftover roast veg, bacon, onion and mushroom (fried off first or the mushrooms go a bit watery), or onion and potato for a spanish style tortilla but really anything goes. I've seen it made with rice or pasta in (obviously avoid if you're following SP) and I tried it once with tuna and grated carrot, although I wasn't keen. Oh, and if you don't like cottage cheese, you can use the same amount of quark instead. I didn't realise that you could have peas on an SP day until yesterday - they're a P not an S, and I bloody love peas so they might just be going in everything from now on!

What are your favourite crustless quiche fillings? Let me know!

Hx

Monday, 12 September 2016

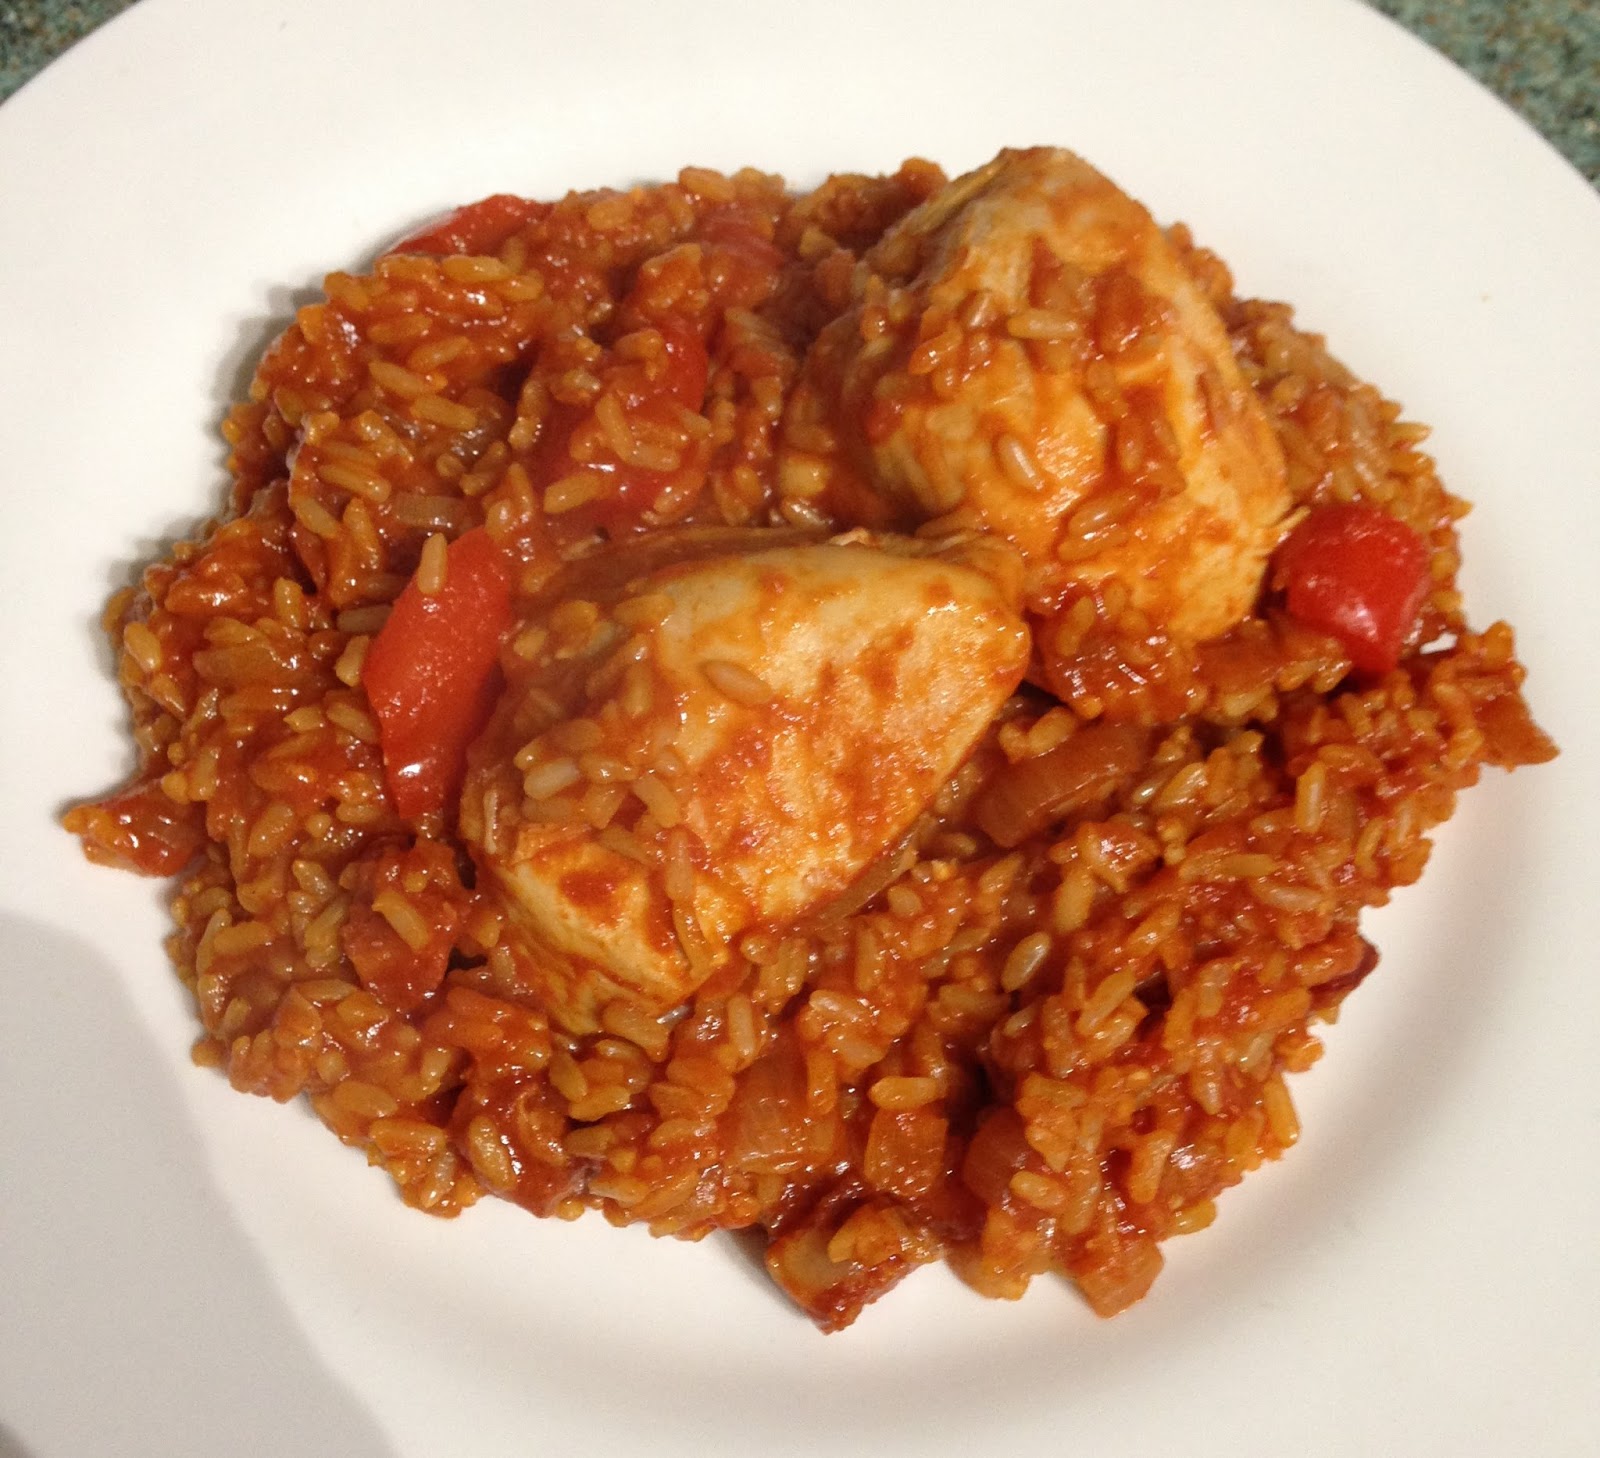
Recipe- Baked Rice with Chicken and Chorizo

I often buy skinless and boneless chicken thighs in my weekly shop, and then usually turn them into a curry or some kind of traybake, but when it came to the end of the week and thicken thighs were staring mournfully at me because I'd left them till last I felt like something different. A bit of a google about and I came across a Jamie Oliver recipe that I'd normally just skim past because he is notorious for using gallons of olive oil, mountains of cheese, being a bit poncy and is far too cheerful about it all. Also, chorizo is by no means syn free and I generally keep my meals as low syn as possible. But on closer inspection I thought I could give it a Slimming World twist - the recipe only called for 50g of chorizo which isn't too bad and the only olive oil in the recipe could easily be replaced by your favourite spray oil. So here it is, my slimmed-down version of Baked Rice with Chicken and Chorizo at 1 1/2 syns per serving. Jamie, eat your heart out!


To make Baked Rice with Chicken and Chorizo for four you will need:


  • 250g wholemeal rice
  • 1 onion, diced
  • 2 cloves of garlic, crushed
  • 1 red or yellow pepper, chopped
  • 50g chorizo (6 syns - so 1.5 syns per portion)
  • 1 tablespoon paprika
  • 500g pack skinless, boneless chicken thighs
  • 500ml passata
  • 300ml chicken stock
  • 1 lemon
  • frylight, or spray oil of choice
Spray a heatproof casserole dish with frylight and add the onion, garlic, pepper, chorizo and paprika, stirring until they start to soften. Add the rice and stir to coat in all the chorizo oil. Add the passata and stock, and zest and juice of the lemon. Put the chicken thighs in, and make sure they're submerged in the sauce before bringing to the boil. Pop the lid on your casserole dish and stick in the oven at 180/gas 4 for around 45 minutes to an hour - you want the rice to be "tender" according to Jamie, and the chicken cooked. If the sauce thickens too much, add a splash of boiling water. Serve with salad or steamed veg of your choice to get your 1/3 speed food in and enjoy.

I took out some of the poncy bits (sorry Jamie) but this really is a one-pot wonder. The kids ate it (although I did have to say the chorizo was pepperami), Mr MGAMT ate it and there was only one pot to wash after. Chicken thighs, done.

Hx

Friday, 9 September 2016

Recipe- Syn Free Butternut Squash Macaroni Cheese

Good morning! I'm full of the joys today as I actually got a full night's sleep! Well 11.30pm-5.50am but that counts as a full night when you have a 10 month old! I'm coffee'd up and ready to go so I thought I'd crack on with posting what we had for dinner last night because it was yummy. I've seen recipes and videos on Buzzfeed etc where people used butternut squash or cauliflower to make a creamy sauce, but as seems usual with Buzzfeed recipes they were usually packed full of cream and cheese and oil so any health benefits of taking out the flour and butter in a cheese sauce were immediately wiped out by whacking in a load of fat instead. I googled a couple of recipes and kind of bodged some together to come up with my own version suitable for slimming. It uses your HEA of cheese, or 6 syns if you don't want to use your healthy extra. But come on, a Healthy A is meant for cheese and anyone who tells you otherwise is wrong.


To make Syn Free Butternut Squash Macaroni Cheese for four you will need:


  • half a butternut squash (cut one lengthways, and save the other half for my Moroccan chickpea tagine, coming soon!)
  • 320g macaroni pasta (I used penne because I'm a rebel and that's all I had, but use what you like)
  • 400ml chicken or veg stock, from a cube is fine
  • half an onion
  • 2 cloves garlic
  • 1.2 tsp paprika
  • 4 lean bacon medallions
  • 160g grated reduced fat cheddar, or 120g full fat cheddar - pick and nice strong one (4 x HEA)
Scrape out the seeds from your butternut squash and spray the cut side with frylight/spray oil, before roasting for about 45 minutes. You can do this earlier in the day to save time, or you can chop it up and boil it but roasting saves you having to wrestle it get it peeled. When you're ready to cook get the pasta going in a large pan of salted boiling water. Soften the onion and garlic in a large frylighted pan for a few minutes before scooping out the flesh from the squash and adding it to the pan. Break up a little with the back of your spoon before adding your stock and bringing to the boil for a few minutes. Pop your bacon under the grill to go nice and crispy while you blend the sauce. You can either use a stick blender (so so cheap if you don't have one, and they're a kitchen essential!) or a food processor like mine (which I love). Get it nice and smooth and creamy before returning to the pan and adding the paprika. Throw in your cheese, reserving one HEA's worth (30g if full fat or 40g if reduced fat) to sprinkle on top. Stir until melted and when your pasta is cooked to your liking drain and add it to the sauce. Reserve a little of the pasta water if the sauce is too thick, and add a splash to thin it down a little. Divide between 4 plates and sprinkle with the reserved cheese, before crumbling your crispy bacon over the top. Delicious!

Mr MGAMT said the sauce tasted like cheesy soup, but I don't think that's a bad thing. He's a veggie dodger though, so I didn't tell him it was made of butternut squash, or I'd have got scalped. The little ones ate it without complaint too. And butternut squash is a great speed food, so you don't even have to add salad on the side to get your 1/3 in. Leave the bacon off if you want it veggie. I love anything cheesy, and while this is nothing like the creamy, gooey, drool worthy mac and cheese I'm dreaming of, it does the job!

Hx

Wednesday, 7 September 2016

Slimming World Classic - Curry Loaf

Curry loaf. Curry loaf? What in the world is curry loaf?! Slimming World members come up with some very unusual combinations of free food just so they can stuff their faces. Sometimes, just sometimes, they're actually ingenious and worth trying. I have no idea how curry loaf came about, but I'm glad it did because it's a great lunchtime option, portable for picnics and packed lunches and good to have in the fridge when you need to shove something in your face before you fall head first into the crisp cupboard (I can't be the only one who has those days - can !?) Serve it with salad and potato wedges for a really filling meal. Just be prepared for the, um, shall we say breeze afterwards. You can also cook in little muffin trays (reduce the cooking time slightly) and take them along to a taster night. Taster night isn't the same without curry loaf!


To make Slimming World Classic Curry Loaf you will need:

  • 1 400g tin of low syn chickpea or lentil dhal (see below for some different options), or 400g home made lentil/chickpea curry - I used leftovers from my Veggie Dhal
  • 1 packet Batchelors curry flavour rice - you can use any savoury rice but the Batchelors curry one is the only one currently syn free
  • 3 eggs
Cook the rice according to packet instructions (I usually do 325ml of water and 10 mins in the microwave). Once the rice is cooked add the dahl and eggs and mix it all up. At this point you can add more veg if you have it or curry powder if you like it hotter. Pour it all into a generously frylight-ed 2lb loaf tin (or use this silicone one and watch your loaf slide out like wet soap) and pop it in the oven at 200/gas 6 for around 40 minutes until set. Serve, and delight in it's curryness and loafyness.

The syns in this really depend on the dahl you use. I always used to use a tin of Asda chickpea dhal but they reformulated it and it's gone from being free to 2 syns a can. Some options are-

  • Aldi Bilash Chickpea Dhal, 1.5 syns per 400g can
  • Asda Chosen by you Chickpea Dhal, 2 syns per 400g can
  • Tesco Chickpea Dhal, 1.5 syns per 400g can
  • Mazadar Chickpea Dhal, 400g Can, Free (available from Morrisons and Home Bargains)
  • Heinz Dhal Curry Lentils or Chickpea Tagine, both Free
Just make sure you check syns as things don't always stay free! Or you could be absolutely sure and protect your losses by making your own. It's easy! Another option is to use baked beans and add veg and curry powder, but I found it far too sweet when I did this.


Have you tried curry loaf? What other Slimming World classics do you recommend?

Hx

Monday, 5 September 2016

Recipe- Syn Free Lasagne

Usually whenever I come across a recipe for a favourite meal that says syn-free I scroll right past that mofo faster than a rat up a drain pipe. They're not usually any good, most of them contain the dreaded quark or mullerlight in place of the good stuff and I'd rather use my syns and have the real thing. Maybe it's just me, but trying to fake something with eggs and sweetener just exacerbates my craving for the real thing. But there are some notable exceptions and this lasagne is one of them. It uses cottage cheese in place of the white sauce and half a HEA of cheese per portion (or if you don't want to use your HEA it's 3 syns) and is so yummy you won't even know you're dieting. Until the rest of the family have giant chunks of garlic bread with it and you don't. Bitter, moi?


To make Syn Free Lasagne for four people you will need:


  • 500g extra lean beef mince
  • 6 lasagne sheets
  • 1 large onion, diced
  • 2 garlic cloves, crushed
  • 1 large carrot, finely diced
  • 1 stick celery, finely diced
  • 1 500g carton passata
  • 1 beef stock cube
  • 8-10 mushrooms, sliced
  • Mixed Italian herbs
  • Garlic powder
  • A shake of Worcestershire sauce
  • A small 300g tub of fat free plain cottage cheese
  • 80g reduced fat mature cheddar (2 x HEA - so 1/2 a HEA per portion)
  • Pepper
  • F-f-f-frylight
In a large pan saute the onion, garlic, carrot and celery in some frylight until softened (5ish minutes). Add the mince and break up with your spoon, continuing to cook until browned. Add your passata, then half fill the tub with water from a recently boiled kettle and add that too along with the stock cube. Stir in the mushrooms, herbs, garlic powder and Worcestershire sauce and simmer it all together for as long as you can - 45 minutes is ideal but if you've only got 30, or forget about it for an hour, it wont hurt. Now it's time to layer it up! Start with a layer of mince - I only do 2 layers so use half but that will depend on your dish (I use one like this). After the mince add half the lasagne sheets then spread half of the cottage cheese on that and season with pepper. Add the rest of the mince, lasagne and cottage cheese for your second layer, then top with the grated cheddar. Pop in the oven for 30-40 minutes and serve with a big salad to get the speed foods in. Proper lasagne, no syns. What's even better is that my fussy family ate celery without complaint. #mumwin

I snapchatted the making of this, which was a lot of fun, so if you'd like to see more of my messy kitchen via the power of snap follow me @hellyboobear!

Any other syn-free version recipe haters? Or syn free recipes that you simply love? Let me know :)

Hx

Friday, 2 September 2016

Recipe- End of the week Veggie Dhal

Picture the scene - it's the end of the week, the fridge is looking bare, and you don't have the energy to drag the kids around the supermarket, the only things in the cupboard are a few tins of pulses that you've had in there since the millennium bug threatened the end of the world and the wrinkly carrots in the veg rack are begging to be put out of their misery. Plus, payday is still 2 days away and you're already watering down the gin to make it last. Throw together a veggie curry, use up those last bits and relish in how tasty and healthy it is. I used to be a vegetarian (but I'm alright now) as a student and curries were a staple - the chick peas and lentils are a cheap source of protein and you can make a huge batch for around £3. Can't say fairer than that.


To make a massive cauldron of End of the week Veggie Dhal you will need:

  • 1 large onion, diced
  • 2 cloves of garlic, crushed
  • 2 tablespoons of curry powder of your choice (I use medium and adjust for the kids with yogurt)
  • 1 teaspoon garam masala
  • 1 tin chopped tomatoes
  • 1 veggie stock cube
  • 1 can of chick peas
  • 1 can of green lentils
  • plus whatever veg you have lurking in the fridge or freezer - I used half a sad butternut squash, a wrinkly leek, two forgotten carrots, and about 4 lumps of frozen spinach. I would have used half a cauliflower as well, but it was just too far gone. RIP little choux-fleur.
  • frylight, or your favourite oil-spray
Sweat off your onions in a generous spray of frylight for a few minutes before adding the garlic for a minute more. Add the spices and toast for about 30 seconds before adding a splash of cold water - this cools the pan and stops the spices from burning. Add the rest of your veg chunked up any old way you like and stir to coat in all the spices. Add the tomatoes, then fill the can with water from a recently boiled kettle and add that too, with the stock cube. Drain and rinse the lentils and chick peas, and throw them in then cover and bring to the boil. Once it's boiling turn it down to a gentle simmer and leave it alone for at least half an hour, but the longer the better. You could chuck it all in a slow cooker and come home to your kitchen smelling like a delicious armpit if that's your thing. I jest, it doesn't smell much like an armpit, but I promise it's tasty and makes enough easily to serve 6 adults depending on how much of a veg hoarder you are (I hold my hands up). Some other good veg to use up would be courgette, squash, peppers, sweet potato, mushrooms (but add these at the end), baby corn, green beans, fresh tomatoes - anything you need to use up really. And it's perfect for SP as long as you don't add potato, parsnip or sweetcorn, yogurt at the end, or serve it with rice. Freezable too, so fill your boots!

Hx

Thursday, 1 September 2016

Recipe- Breakfast Stuffed Peppers

Howdy, it's been a while! Life got busy for a bit; the baby started crawling so I've been on constant is-she-eating-catfood-again watch, then she cut a tooth, then she decided sleep is for the weak. Plus the boys are off school for a few more days so I've been made to go Pokemon hunting every waking hour of the day. They're back on Monday and me being me I've left all of the school uniform buying to the absolute last minute so my weekend will be spent crying in a corner in Clarkes. Fun times! On the bright side, I did get my Club 10 last week (meaning I lost 10% of my starting weight) and lost another 2lbs this week, so all that Pikachu hunting paid off.

Today's recipe is a breakfast favourite of mine; despite being fairly small it packs a punch and is really filling. The cheese is either 1/4 of your Healthy A, or 1 and a half syns, or if you want to be really saintly leave it out altogether (but don't, it's worth it). I think the pepper and mushrooms should cover your 1/3 speed, but if you want chuck some cherry toms in to roast with it. SP friendly too.


To make a Breakfast Stuffed Pepper for one person you will need:


  • one good-sized red or yellow pepper
  • 2 mushrooms
  • 2 lean bacon medallions
  • 1 big tablespoon baked beans
  • 10g reduced fat cheddar
  • 1 egg
  • salt and pepper


Carefully take the top off your pepper and remove the seeds and membrane-y bits. If your pepper wont stand up, carefully slice the bottom so it's flat (If you accidentally cut a hole through the pepper, use the bit you cut off to plug it up or your filling will leak out). Pop it in the microwave for 2 minutes to soften. Meanwhile chop your mushrooms and bacon, and once the pepper is done nuke that for 2 minutes too. Season the inside of your pepper and put the cooked mushrooms and bacon in the bottom. Top that with the beans, then the cheese, making sure you have room to crack your egg on top. Season again and pop in the oven at about 200/Gas 6 for 15-20 minutes until the egg is cooked to your liking - but if you can get a runny yolk you're a better woman than me!


These really make a great breakfast, and for fairly little effort. For even less effort, forget the pepper and just layer up the fillings in a ramekin (to be fair, that's what I usually do, but I was feeling fancy). You can experiment with different fillings too; onions, tomatoes, cooked sausages, ham - anything goes I guess. Just don't over fill them or you'll end up with spillage akin to a Ben and Holly jelly flood. If you don't get that reference, you obviously don't have kids (or at least not young ones) you lucky lucky bastard. I'm off to get ready for the weekend, wish me luck and pass the prozac!

Hx